# How to use Provider Admin API for workflow automation with Git Sync?
# Use GitHub CI/CD Pipeline to Sync API Project with FabriXAPI
By leveraging FabriXAPI, API providers can publish their API to the world for collaboration or potential business opportunities. API users sign up for free and discover all APIs that work best for their projects and business. FabriXAPI enables API providers to bootstrap their API journey.
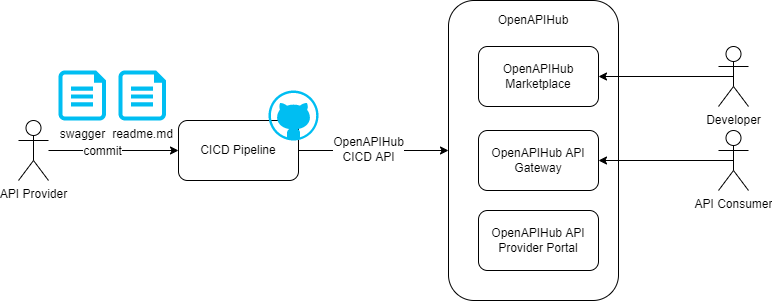
The journey is scalable and evolvable. API providers can keep enhancing their API and deliver via FabriXAPI. It will involve API design (swagger file) update and corresponding API Tutorial (readme.md) update. FabriXAPI can streamline the CI/CD process via the Provider Admin API. API providers can adopt the CI/CD pipeline on GitHub. Once the API design doc (swagger file) or user guide (readme.md) update is committed, the pipeline will update Provider Admin API accordingly.

# Hands-on tutorial
You need to register as an API provider on FabriXAPI before adding APIs, please follow Register as an API Provider and Generate API Portals to register as a provider.
# 1. Create provider key
Log on FabriXAPI provider portal https://provider-portal.fabrixapi.com/ (opens new window)
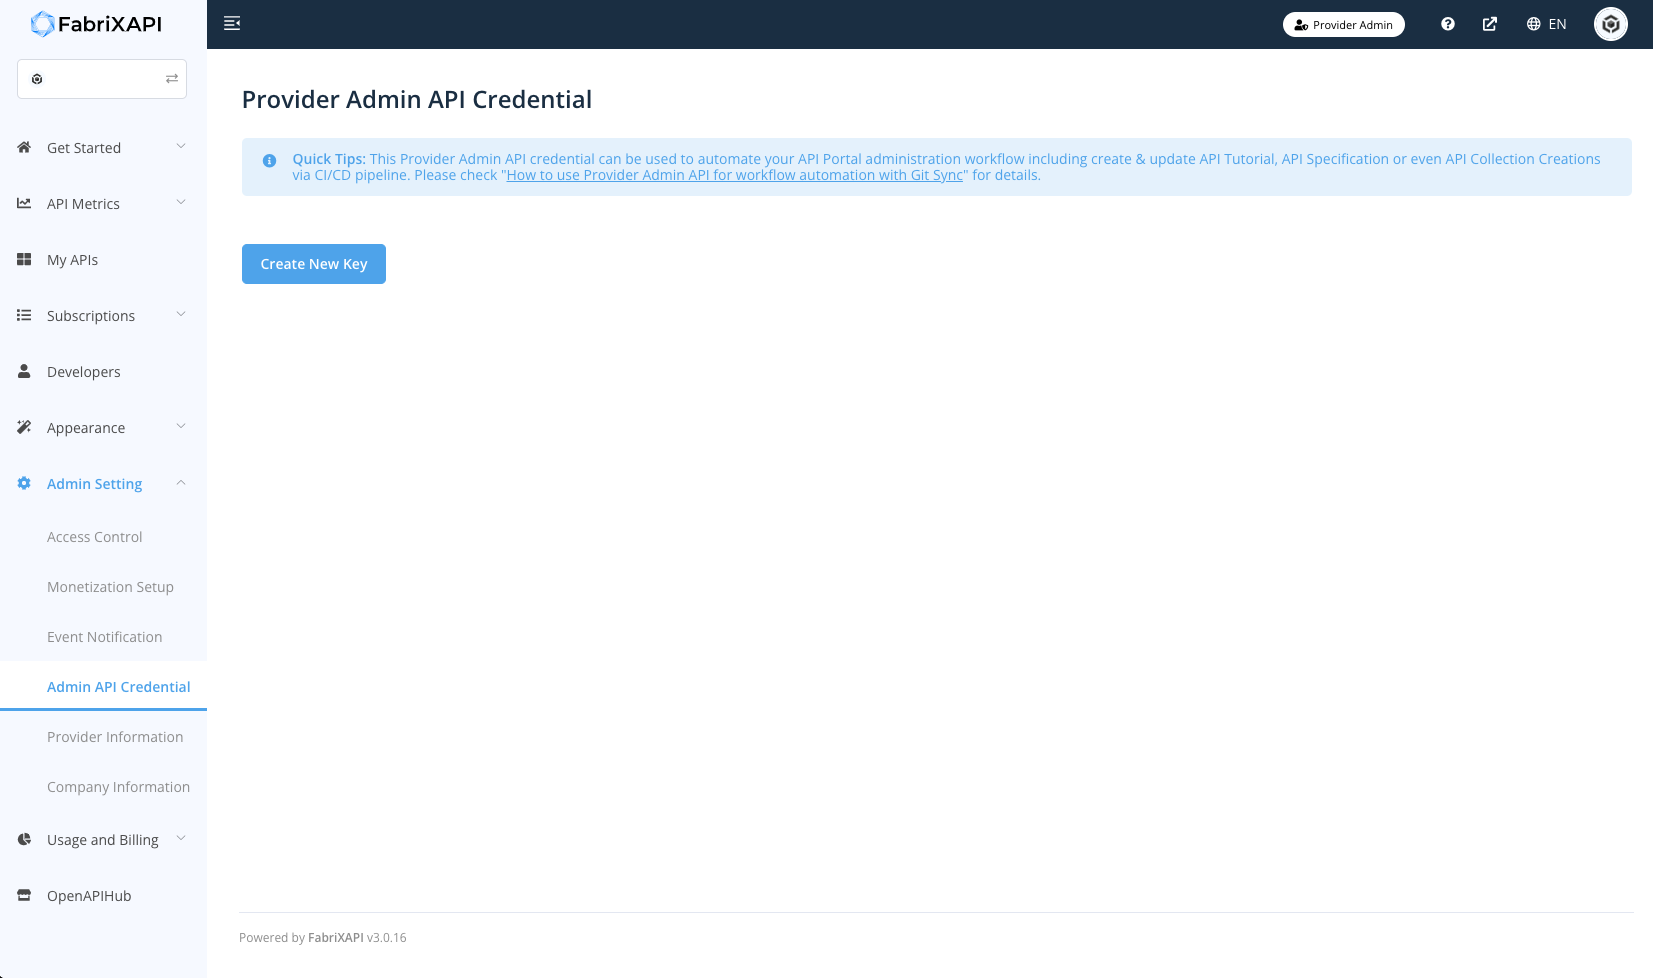
Access "Admin API Credential" tab on Provider Admin Portal sidebar and create your provider key. Note that You cannot retrieve the key after leaving this page, please store your key safely. You need to regenerate another key if you lose the current key.

# 2. Set up GitHub runner
A runner is a server that runs your workflows when they're triggered. Each runner can run a single job at a time. GitHub provides Ubuntu Linux, Microsoft Windows, and macOS runners to run your workflows; each workflow run executes in a fresh, newly-provisioned virtual machine. If you need a different operating system or require a specific hardware configuration, you can host your own runners. For more information about self-hosted runners, see "Hosting your own runners (opens new window)"
# 3. Set up GitHub environment variable/secrets
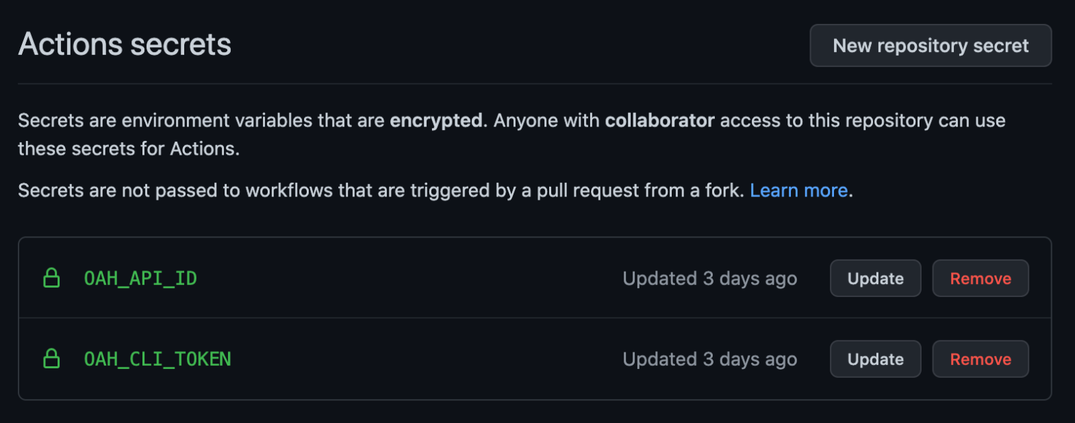
Create Github action secret OAH_CLI_TOKEN and OAH_API_ID which OAH_CLI_TOKEN is your provider key and OAH_API_ID is your repository managing API's ID

# 4. Set up GitHub FabriXAPI workflow
Create .github/workflows/oah-api-sync.yml and put it to the project repository
name: My FabriXAPI CICD Update Job

on:
  push:
    branches:
      - main

jobs:
  openapihub-api-file-sync:
    runs-on: ubuntu-latest
    steps:
      - uses: actions/checkout@v2
      - uses: OpenAPIHub/github-api-sync@v1.0.0
        with:
          OAH_CLI_TOKEN: ${{secrets.OAH_CLI_TOKEN}}
          OAH_API_ID: ${{secrets.OAH_API_ID}}
          README_LOC: ''
          SWAGGER_LOC: ''
| Name | Required | Default | Description |
|---|---|---|---|
| OAH_CLI_TOKEN | ✔️ | OpenAPIHub CLI Token | |
| OAH_API_ID | ✔️ | API ID (UUID) in OpenAPIHub | |
| README_LOC | './openapihub/readme.md' | Readme file location in repository | |
| SWAGGER_LOC | './openapihub/swagger.json' | Swagger file location in repository |
# 5. Test FabriXAPI workflow
In oah-api-sync.yml, it involves GitHub workflow action - OpenAPIHub/github-api-sync@v1.0.0. The workflow will call the OAH Provider Admin API with provider key and API ID which is set in GitHub action secret.
The above example workflow is triggered by push action on branch main. You can change the behavior via "on:" value. Details of GitHub workflow can check https://docs.github.com/en/actions/learn-github-actions/understanding-github-actions (opens new window)
It takes a few minutes to complete the process and you can check the progress on GitHub console. If you update a swagger file, you will receive an email after FabriXAPI validates and processes the file.

Congratulations! You have completed FabriXAPI GitHub CI/CD Integration.
You can check the swagger upload history on FabriXAPI provider portal (https://provider-portal.fabrixapi.com (opens new window)) and further edit your API basing on Edit API as Providers.