# Integrate APIs with FabriXAPI with AWS Lambda
The AWS Serverless Application Model (SAM) is an open-source framework for building serverless applications. It provides shorthand syntax to express functions, APIs, databases, and event source mappings. With just a few lines per resource, you can define the application you want and model it using YAML. During deployment, SAM transforms and expands the SAM syntax into AWS CloudFormation syntax, enabling you to build serverless applications faster.
# Overview
- This is a guideline to help you as an API Provider host your API using AWS Lambda and integrate it with FabriXAPI (opens new window).
- This guide will also help you set up the required tools for developing your API on AWS Lambda.
# Prerequisites
- This guideline assumes you are using macOS. Some modifications to the method may be required for developing using another OS, but the tools should still work.
- This guideline assumes you are using JavaScript with Node.js (opens new window) installed.
- This guideline will use the "World Clock" project as the main example: GitHub - guidesmiths/world-clock: A world clock underwritten by js-joda and zoneinfo (opens new window).
- You must have the rights to run AWS/SAM CLI on your device.
- You must have the rights to create Lambda and API Gateway resources on your AWS account.
- If you are implementing your own API, it must also fulfill the below requirements:
- Stateless
- The string input and output must be compatible
- Size: less than 50MB
# Key Steps
- Set up the AWS/SAM CLI
- Prepare Swagger File
- Prepare the API
- Create and test your lambda function locally
- Deploy and test your lambda function in AWS
# 1. Setting up AWS/SAM CLI
This is a one-time action you must complete if you have not set up AWS/SAM CLI before.
On MacOS:
/bin/bash -c "$(curl -fsSL https://raw.githubusercontent.com/Homebrew/install/master/install.sh)"
brew tap aws/tap
brew install aws-sam-cli
For Windows / Linux, please learn more here: Installing the AWS SAM CLI - AWS Serverless Application Model (opens new window)
# 2. Prepare Swagger File
In order to publish your API on FabriXAPI (opens new window), your API needs a Swagger file. The Swagger file will include a definition of the properties of your API, so this step should be completed before writing your application logic.
Below shows an example of a Swagger file:
openapi: 3.0.0
info:
  title: Trial API World Clock
  description: |-
    # Introduction
    This is Trial API World Clock
  version: 1.0.0
servers:
  - url: https://<API Gateway domain>/<env>
paths:
  /academicapi/worldclock:
    get:
      tags:
        - academic-api
      summary: >-
        It is API to query date by inputing timezone
      description: Get date by timezone
      parameters:
        - name: timezone
          in: query
          schema:
            type: string
          example: Europe/London
      responses:
        '200':
          description: Successful response
          content:
            application/json: {}
# 3. Prepare the API
Your API should be in the form of a JavaScript project, in this example we will use Node.js.
TIP
Also note that an extra JSON file is required for local testing. This file is usually named event.json but can take other names as well.
Your project should follow the following folder structure:
project
│   template.yaml
|   swagger.yml
│
└─── <application_name>
    │   index.js
    │   package.json
    │   event.json
Here are some brief explanations of the project files:
- index.js - lambda handler and application logic
- package.json - application dependency file (package.json can be generated by command "npm init". Optionally can run "npm install" for package-lock.json as well)
- event.json - lambda event file for local testing
- template.yaml - file to config lambda and API gateway
- swagger.yml - Swagger file
# Index file
Below shows an example of index.js -
'use strict';

console.log('Loading function');

// Update here to import your module
const clock = require('world-clock')()

exports.handler = (event, context, callback) => {
    console.log('Received event:', JSON.stringify(event, null, 2));

    const done = (err, res) => callback(null, {
        statusCode: err ? 400 : 200,
        body: err ? err.message : JSON.stringify(res),
        headers: {
            'Content-Type': 'application/json',
        },
    });

    try {
        // Define and get query string input here
        var parm1 = event.queryStringParameters['timezone'];

        // Define and get input header here
        //var header1 = event.headers['timezone'];

        // Get the request path. If using ALB, pathParameters can only get from the path
        //var req_path = event.path;

        // Get the request path.
        //var req_body = event.body;

        switch (event.httpMethod) {
            case 'DELETE':
                // Define application logic here and comment the error handling
                done(new Error(`Unsupported method "${event.httpMethod}"`));
                break;
            case 'GET':
                // Define application logic here and comment the error handling
                var result = clock.today(parm1).toString();
                done(null,result);
                //done(new Error(`Unsupported method "${event.httpMethod}"`));
                break;
            case 'POST':
                // Define application logic here and comment the error handling
                done(new Error(`Unsupported method "${event.httpMethod}"`));
                break;
            case 'PUT':
                // Define application logic here and comment the error handling
                done(new Error(`Unsupported method "${event.httpMethod}"`));
                break;
            default:
                done(new Error(`Unsupported method "${event.httpMethod}"`));
        }
    } catch (error) {
        console.error(error);
        done(new Error(`Bad Request`));
    }
};
This is the lambda logic. You need to edit the module, query and application logic in order to complete the file. The template includes headers, paths and body as inputs, and the HTTP methods GET, DELETE, POST and PUT. Note that in this guide, you should define the query parameters and methods that are defined in the Swagger file.
# NPM Package file
Below shows an example of package.json -
{
  "name": "trial-API-functions",
  "version": "1.0.0",
  "private": true,
  "dependencies": {
    "world-clock": "^1.4.0"
  }
}
package.json can be generated by command "npm init". Optionally can run "npm install" for package-lock.json as well.
# Local Testing File
Below shows an example of event.json -
{
  "httpMethod": "GET",
  "path": "/academicapi/worldclock",
  "queryStringParameters": {
    "timezone": "Europe/London"
  },
  "headers": {
    "accept": "*/*",
    "timezone": "Europe/London",
    "user-agent": "curl/7.64.1",
    "x-forwarded-port": "443",
    "x-forwarded-proto": "https"
  },
  "body": "",
  "isBase64Encoded": false
}
This file defines a HTTP request to be sent to the API for testing.
# Template file
Below shows an example of template.yaml -
AWSTemplateFormatVersion: '2010-09-09'
Transform: 'AWS::Serverless-2016-10-31'
Description: >-
  A simple backend for a RESTful API endpoint.
Resources:
  ApiGatewayApi:
    Type: AWS::Serverless::Api
    Properties:
      StageName: beta
  WorldClockAPIEndpoint:
    Type: 'AWS::Serverless::Function'
    Properties:
      Handler: index.handler
      Runtime: nodejs14.x
      CodeUri: ./worldclock
      Description: >-
        A RESTful API endpoint to display world clock.
      MemorySize: 512
      Timeout: 10
      Events:
        ApiEvent:
          Type: Api
          Properties:
            Path: /academicapi/worldclock
            Method: ANY
            RestApiId: !Ref ApiGatewayApi
You may have to edit this file for your own project. Make sure that:
- The runtime version is correct.
- CodeUrl points to the folder containing your index.js file.
- Path is the same as the path defined in your Swagger file.
# 4. Create and test lambda function locally
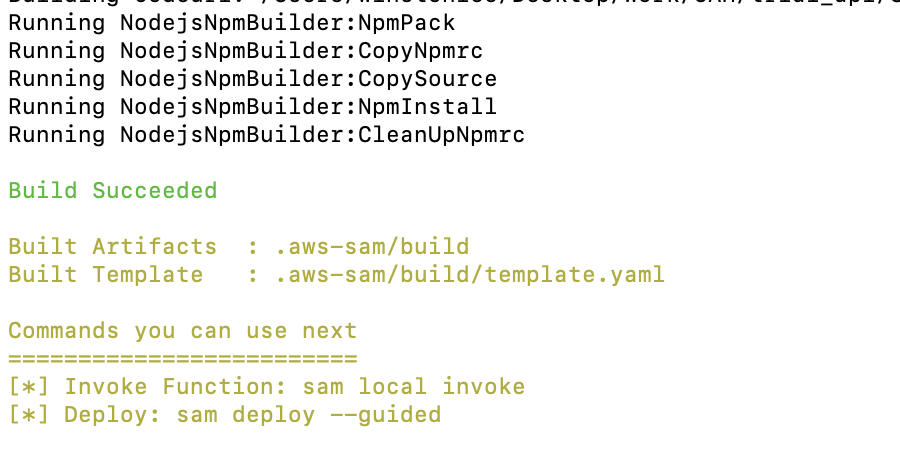
Run the sam build command at the same directory as template.yaml in order to create your lambda package.
sam build
The build result can be found in .aws-sam/build.

After building, you can now perform some local tests with the JSON file created previously using the command:
sam local invoke -e (json path) (endpoint name)
For example, in this our case it would be:
sam local invoke -e worldclock/event.json WorldClockAPIEndpoint
You should see output that looks like this:

If there are any issues, fix the code and run sam build again before re-testing.
# 5. Deploy and test lambda function in AWS
First create a role (opens new window) in AWS with the rights to create AWS Lambdas and API Gateways. Save the following information from the AWS console:
- Role ARN
- Access Key ID
- Secret Access Key
- Session Token
Use the following code template and replace the variables in carets with the values you saved earlier:
aws sts assume-role --role-arn <Role ARN> --role-session-name AWSCLI-Session
export AWS_ACCESS_KEY_ID=<AccessKeyId>
export AWS_SECRET_ACCESS_KEY=<SecretAccessKey>
export AWS_SESSION_TOKEN=<SessionToken>
aws sts get-caller-identity
You should now be able to see your identity by calling get-caller-identity.
Let's deploy our Lambda from the command line:
sam deploy --guided --region <AWS Region>
You will be guided through the deployment setup. It is recommended to use the following settings:
Stack Name [sam-app]: trialapiendpoint

AWS Region [us-west-2]: ap-east-1

Confirm changes before deploy [y/N]: y

Allow SAM CLI IAM role creation [Y/n]: y

Disable rollback [y/N]: n

<project_name>APIEndpoint may not have authorization defined, Is this okay? [y/N]: y

Save arguments to configuration file [Y/n]: y

SAM configuration file [samconfig.toml]: samconfig.toml

SAM configuration environment [default]: beta
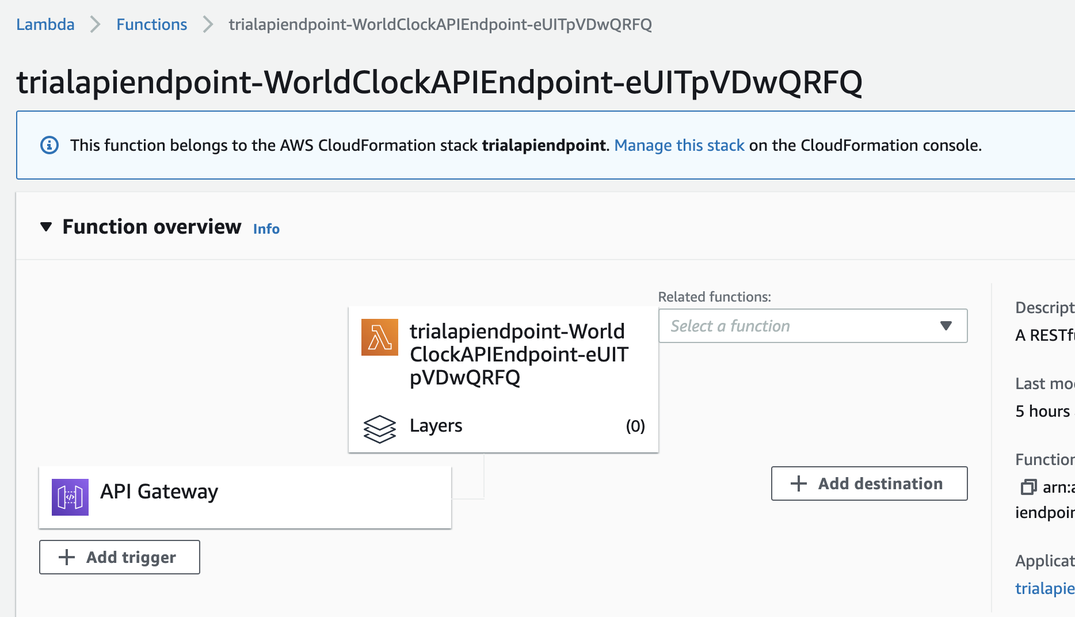
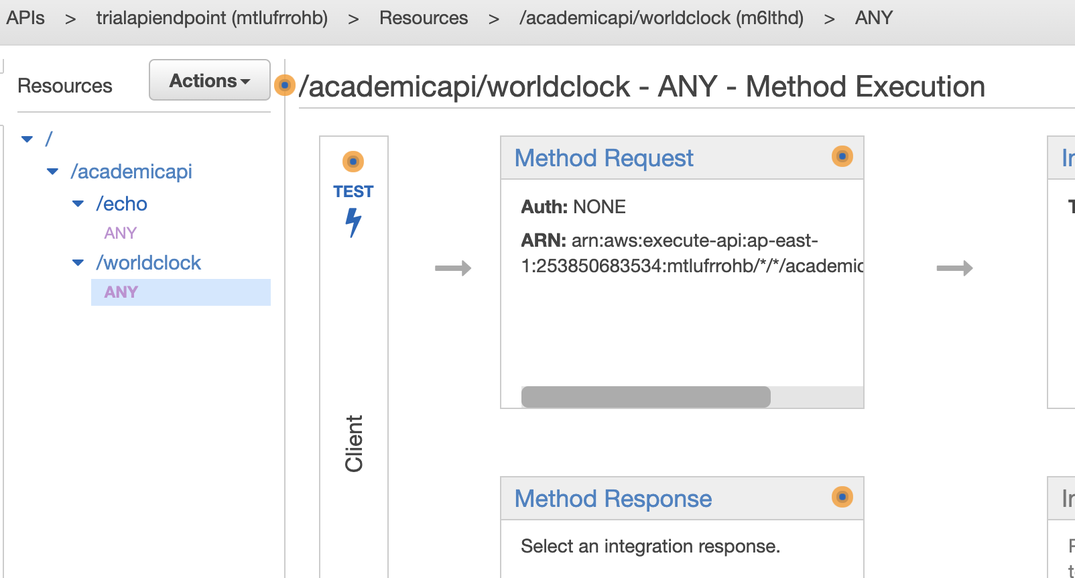
It should be deployed afterwards. Confirm that the Lambda and API Gateway are both live to ensure everything has been successfully deployed:
Lambda on AWS console

API gateway

You have deployed your API successfully. You should test your endpoints with Postman (opens new window) or cURL (opens new window) to make sure it works correctly.
curl -i "https://<API Gateway domain>/<env>/academicapi/worldclock?timezone=Europe/London"
Congratulations! You have hosted your API on AWS. You can now update your Swagger file with the parameters <API Gateway domain> and <env> in your project. Next, you should follow this guide (opens new window) to create an API Portal for your API and display it on API Portal.